I have spent some time recently building bots for Slack using Glitch, and it is one of the most fun experiences I have had writing code.
If you haven’t used Glitch before, it’s an online code editor for Node.js that automatically saves and restarts your application on edit and hooks it up to a domain. Using this, you can iterate on your application quickly. When developing a bot for Slack, you can pop back and forth between Glitch and Slack and see changes in real time.
What can you do with a Slack bot?
There are multiple ways to build bots for Slack and they have different capabilities. I’m sticking with the Web and Events APIs, both of which operate using plain web requests. There is a Real Time Messaging (RTM) API which acts much more like a logged-in user, but it requires WebSockets, which we won’t use here. The primary part of the API we will use is the Events API, which causes a web request to be made to my Glitch instance (or other server) whenever certain events happen.
Slack slash commands are documented and set up separately from the Events API, but operate using the same principal – Slack makes a web request to our server when a slash command is made by a user.
Using these APIs, we can respond to almost any sort of activity – slash commands, regular messages, people joining a channel – and interact. We can do anything we want to in Node – looking up information, contacting other APIs – triggered by messages from Slack.
My example bot is one that returns a collection of random data when I ask for it.
Creating a new Glitch project
Before we create a new Slack bot, we need to create a Glitch project that will handle requests from Slack. When you go to Glitch, you will see a button to start a new project. Click it, and then click “Create a Node app”.

Once you have a new project created, select server.js and paste the following code:
var http = require('http');
http.createServer(function (req, res) {
    res.writeHead(200, {'Content-Type': 'text/plain'});
    res.end('Hello World\n');
}).listen(process.env.PORT, "0.0.0.0");
console.log('Server running at port ' + process.env.PORT);
You don’t necessarily have to paste the above if you know what you’re doing. If not, this is Node.js code to create a web server and respond with “Hello world”.
Click on the name of your project. You should see a URL beneath it like “https://

Creating a bot on Slack
First, you need a Slack instance that you have admin access to. The easiest option is to create your own Slack instance. I have one of my own just for my personal bots.
Now, we can set up Slack for our bot. Go to https://api.slack.com/apps where you should see a page like the following:
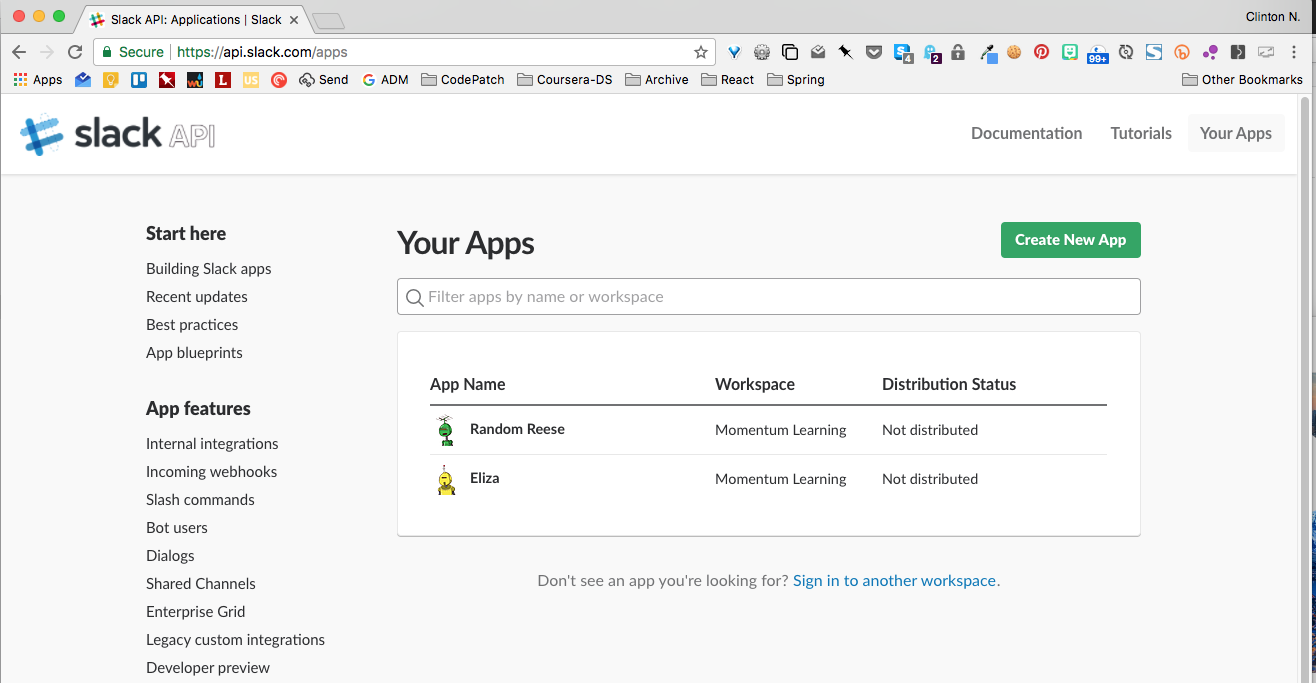
Click “Create New App.” You will be asked to give your app a name and to choose a workspace – a Slack instance – for your app. You’ll then see the following screen:
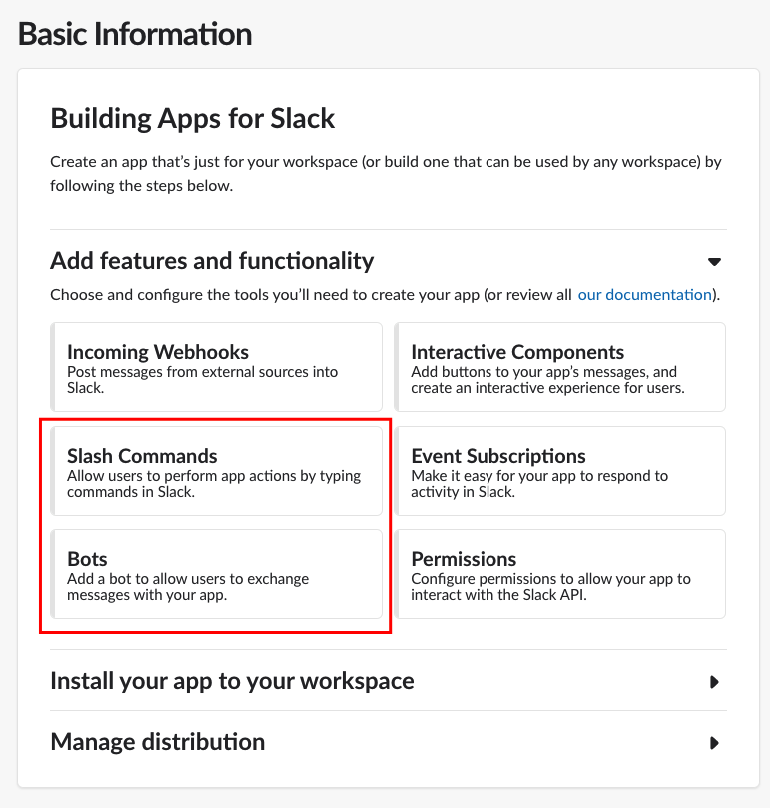
I’ve highlighted the two areas under features that we’ll work with. Click “Slash Commands” and then “Create New Command” to create a slash command. Slash commands are a way to communicate with your app by typing commands that start with a slash. Generally, your app will reply privately to you. Slash commands can be used anywhere, not just in a channel that your bot is in.
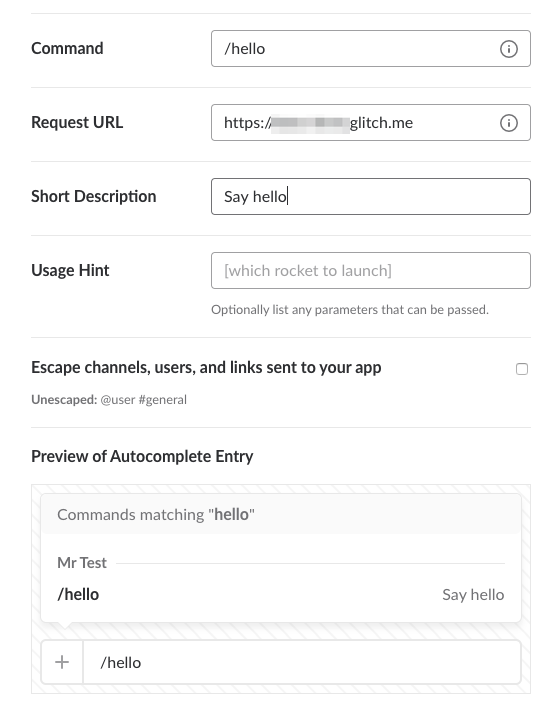
The important thing to note in this picture is the request URL. This is the external URL for your Glitch app. Go ahead and create your own slash command.
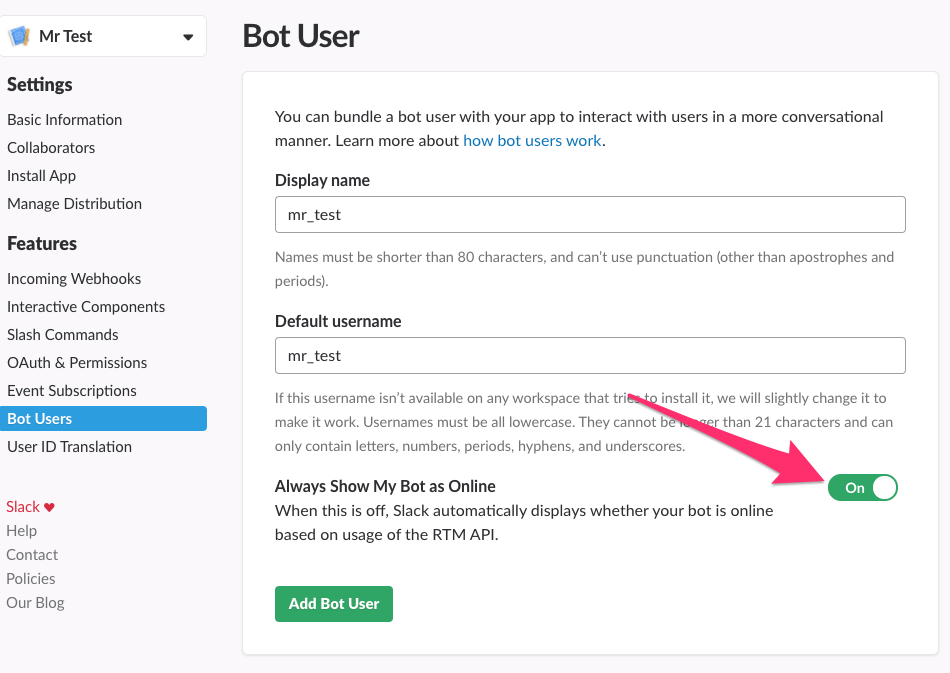
Create a bot user by clicking “Bot Users” under “Features.” Make sure to select “Always Show My Bot as Online.” Because we aren’t using the RTM API, we’ll want this so people can interact with our bot.
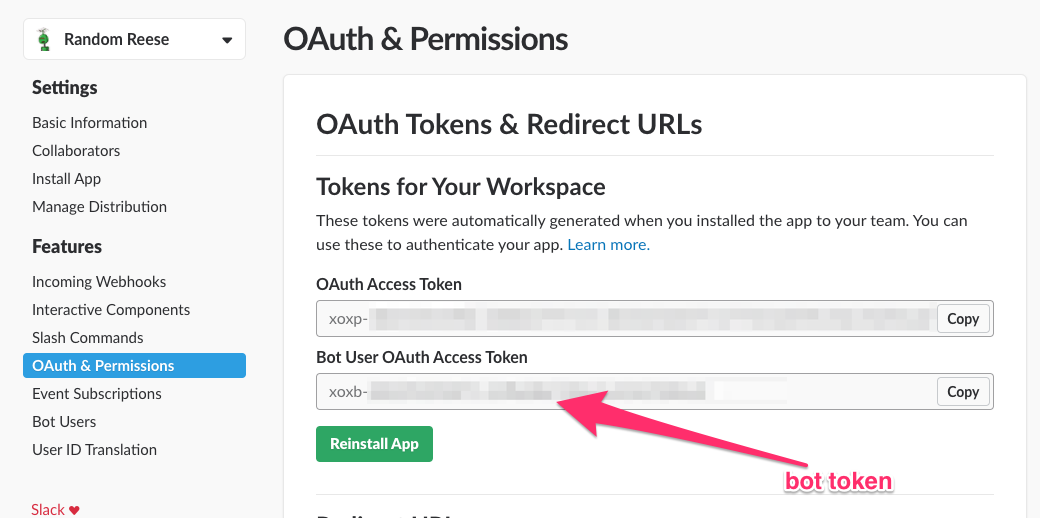
Next, choose “Install App” from the settings and click “Install App to Workspace.” You should see a bot user token afterward. We’ll need this later.

We are finally all set up. You should be able to run the slash command you made in Slack and receive back the text “Hello world!” This is coming from our small Node app we created previously.
If that worked, great! We can now improve our Slack app.
Updating our code to use TinySpeck
Let’s change our bot to say hello in multiple languages. We’re going to use a library called TinySpeck to interact with Slack. It will parse events from Slack that are sent to us and make it easy to create handlers.
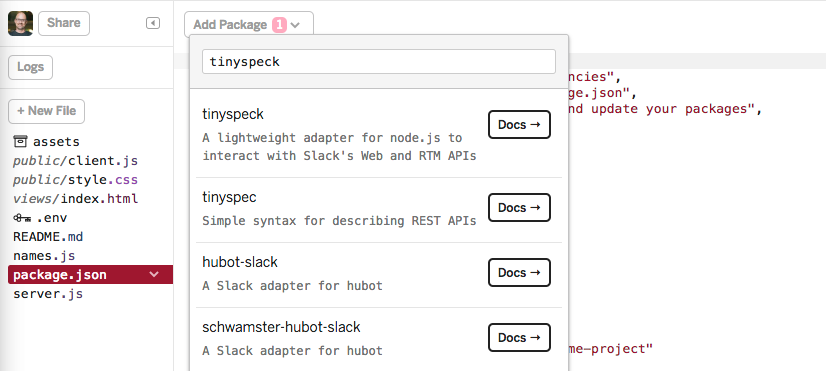
First, edit your package.json file to add TinySpeck as a dependency. In Glitch, there is an “Add Package” button when you edit package.json. Click that button and search for “tinyspeck”.
Next, edit your .env file to add your bot token from earlier. Add a new line to the file like:
BOT_TOKEN=xoxb-12345-abcd
Now we can finally update our code. Edit server.js. Here’s my example of responding to a /hello slash command with hello in a random language.
// server.js
const tinyspeck = require('tinyspeck');

const slack = tinyspeck.instance({
    token: process.env.BOT_TOKEN
});

const greetings = ['Hello!', 'Hi there!', 'Bonjour!',
    'Saluton!', '여보세요', '¡Hola!'];

const getGreeting = function () {
    return greetings[Math.floor(Math.random() * greetings.length)];
}

slack.on('/hello', function (event) {
    const response_url = event.response_url;
    slack.send(response_url, {
        text: getGreeting()
    })
});

slack.on('*', event => { console.log(event) });

slack.listen(process.env.PORT, process.env.VERIFICATION_TOKEN);
Notice the lines starting with slack.on. Each of those is an event handler. The one with an asterisk handles all events and will print out each event from Slack.
The sky is the limit from here. To see a full Glitch app I made to give me all sorts of random data in Slack, check out Random Reese on Glitch. You can copy it to make your own version.